How to use the Ansel Adams Black and White Zone system in the digital world.
National Geographic Contributor & Cover Photographer · Ken Burns PBS Emmy Series · NPS & BLM Authorized Permittee · Former Gallery Owner · Annenberg Space for Photography
The Zone System — and Why It Decides Whether a Large Black and White Print Holds Together
Everyone talks about black and white. Almost nobody explains the grays — which is where the picture actually lives.
Black and white is not two colors. It is one continuous scale, and everything that matters in a monochrome photograph happens in the middle of it. The Zone System is the method for controlling that middle — for deciding, before the shutter opens, exactly which parts of a scene will land where on the scale from pure black to pure white.
Ansel Adams and Fred Archer worked it out around 1940 for sheet film. The tools have changed completely. The problem has not changed at all.
The problem it solves
Every capture medium has limits. Film could not record the full range of light in front of it, and neither can a digital sensor. Stand in a canyon at midday and your eye handles the bright rim and the deep shade without effort. The camera cannot. Something is going to be lost.
The Zone System is how a photographer decides what gets lost — deliberately, in the field, rather than discovering it afterward. You look at the scene, decide what the finished print needs to look like, meter for the tones that carry the picture, and expose so those tones survive. Adams put it in five words: expose for the shadows, develop for the highlights.
The scale runs from pure black with no detail at one end to pure white with no detail at the other, with middle gray in the center. A photograph that uses only the extremes is a graphic. A photograph that lives in the grays between them is a picture. The difference between a black and white print that looks striking on a phone and one that still rewards you three years into owning it is almost entirely a question of how much information is in those middle tones.
Why it still matters in digital
Adams anticipated digital before it existed, and the discipline transferred directly. The exposure decision is the same decision. What changed is where the control happens — the negative and the developing tray became the raw file and the processing, and the sensor's dynamic range replaced the film's.
What did not change is that the choice has to be made when you are standing there. Nothing recovers a tone the sensor never recorded. A file with the shadow information intact can be worked in a dozen directions later. A file where the shadows went to nothing is finished, and no amount of processing will invent what was not captured.
Selective contrast is the other half of it — controlling the tonal relationships within specific areas of the frame rather than lifting the whole image at once. Deepen a shadow here, hold a highlight open there, shape the midtones so the eye goes where the picture wants it to go. It is the modern version of the burning and dodging Adams did under an enlarger, and it is the reason a finished black and white print looks nothing like a color photograph with the saturation pulled to zero.
Large print, or large format print?
This is the part worth understanding before you spend serious money on a big black and white piece, and almost nobody explains it.
Adams worked in 4×5 and 8×10 sheet film. He did that because a bigger negative holds more tonal information — more separation between adjacent grays, smoother transitions, more detail surviving in the shadows. The Zone System and large format went together. One was the discipline; the other was the capacity to render what the discipline preserved.
Most photographers selling "large format prints" today are shooting standard 35mm-size sensors and printing them on a large format printer. The printer is large. The capture is not. That is a big photograph, and it can be a very good one — but it is not the same object as a print made from a genuine medium format file, and the difference shows up exactly where black and white lives: in the tonal transitions, in the shadow detail, in the texture of a surface at forty or sixty inches across.
Every image in these galleries is captured at 100 megapixels. Whether that approaches true 8×10 sheet film is a fair argument and serious photographers land on both sides of it. What is not in dispute is the gap between medium format capture and a 35mm sensor once you go large — and in monochrome, where there is no color to carry the image, that gap is the whole picture.
A practical test when you are shopping. Ask what the image was captured on, not what it was printed on. Ask what the file resolution is. Any photographer selling genuine large-format work will answer immediately.
Where this shows up in the work
In practice the Zone System is why certain photographs exist at all. A white bird against snow is close to the hardest exposure in photography — almost the entire picture sits in two or three zones at the top of the scale, and if you meter it the way the camera wants, the bird disappears. Yosemite granite in a winter storm is the opposite problem, with the whole scene compressed low and the detail hiding in the shadows.
Those are the conditions that produce the strongest black and white pictures, and they are the conditions in which a camera left to its own judgment fails. Fifty years on, the method Adams codified is still what gets you through them.
Black & White Landscape collection → · Black & White Wildlife collection → · The full black & white philosophy →
Common questions
What is the Zone System, in one sentence?
A method for controlling the relationship between black, white, and the shades of gray between them — by deciding in the field which tones the final print must hold, and exposing so those tones survive the limits of the capture medium.
Does the Zone System still apply to digital photography?
Yes. The medium changed; the problem did not. A sensor still cannot record everything the eye sees, so the photographer still has to decide what to protect. The decision now happens at exposure and carries through raw processing rather than through negative development.
Why do the middle grays matter more than the blacks and whites?
Because that is where the subject actually is. Pure black and pure white contain no detail by definition. Texture, form, depth, and the sense of a real surface all live in the tones between — which is why two black and white prints of the same scene can be so different in the room.
What is the difference between a large print and a large format print?
A large print is any image output at large size, including from a small sensor. A large format print is made from a capture with enough resolution and tonal information to hold up at that size. The printer determines dimensions; the camera determines whether the print survives close inspection.
What print material best preserves tonal depth in black and white?
Lumachrome HD TruLife Acrylic gives the greatest apparent depth and luminosity in the grays. Chromaluxe Metal gives the cleanest separation at the high-contrast end. Hahnemühle Fine Art Paper gives the warmest, most traditional rendering and is the closest thing to the look of a fiber print. All three are offered here, and which one suits a given image is a real conversation — not a formality.
How large can a black and white print be made?
From 16×20 inches up to the largest size each material allows. Architectural and mural-scale installations are produced through a separate custom process — contact Jess directly to discuss a specific wall.
Considering a large black and white piece?
Send a photo of your wall and the image you have in mind. Jess will come back with a scaled room preview and an honest recommendation on size and material.
Free, and no obligation.
Related: Black & White Photography · B&W Landscapes · B&W Wildlife · Ansel Adams · Yosemite Winter · For Designers & Trade
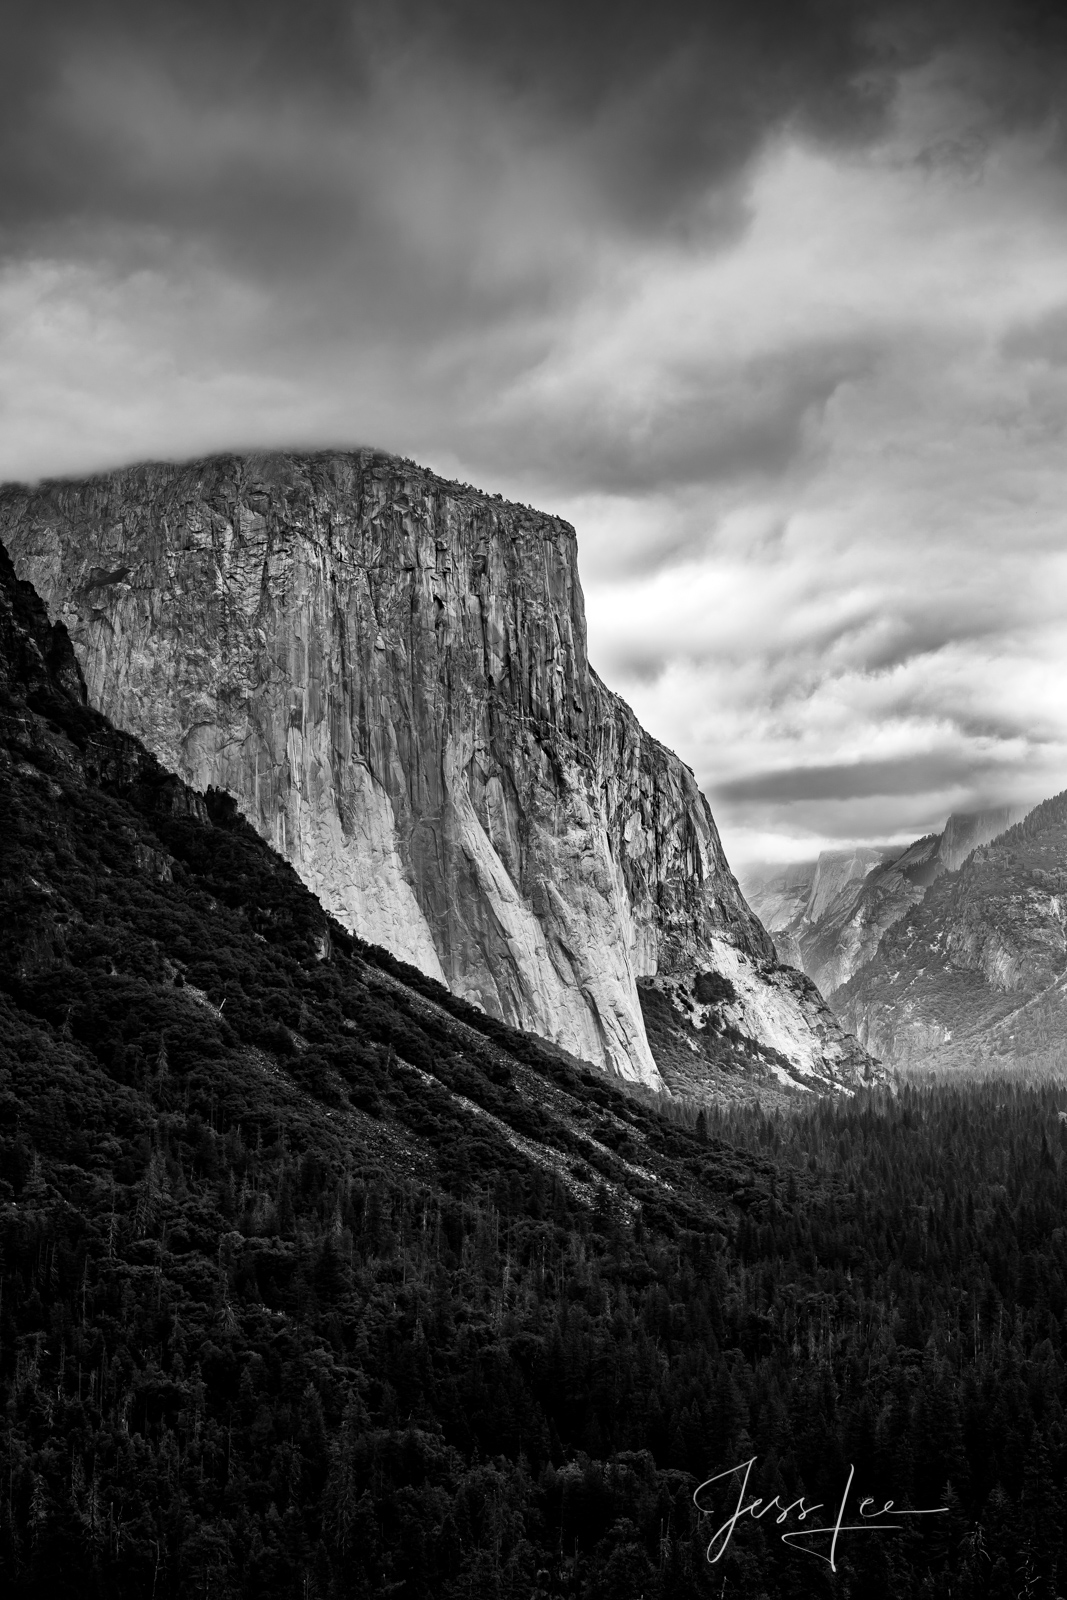
Fine Art Limited Edition Photography Print of Dome Light in Yosemite Valley, California.
Photos copyright © Jess Lee