
Notes on Single Shot Milky Way Photography.
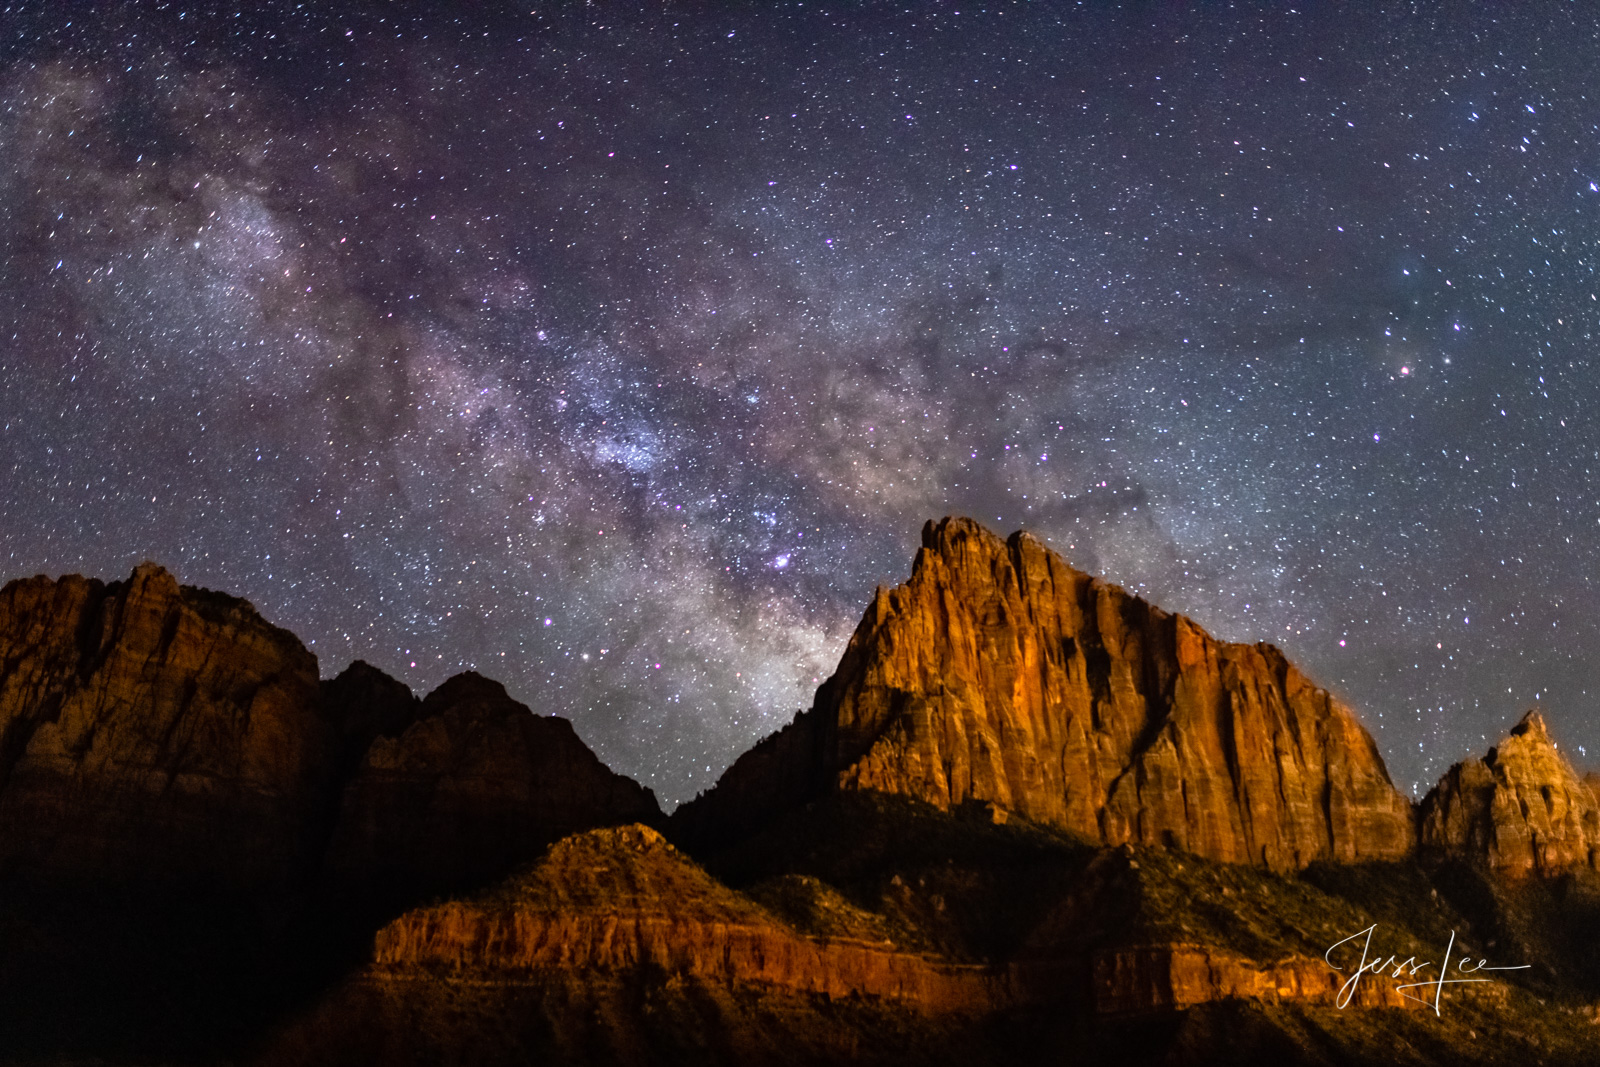
Limited Edition of 200 Exclusive high-resolution Museum Quality Fine Art Prints of the Night Sky at Zion. Photos copyright © Jess Lee
Marginally in Depth Technical Recommendations for Milky Way Photography in the Southwest using a single shot.
Spolier - Fast Lens - Very Sturdy Tripod, iso 6400, 8 second exposure. Focus on a bright star and recheck during the session. Find a stong foreground element.
Nice to know but more complicated than necessary.
1. Introduction: The Unique Demands of Milky Way Photography in the Southwest
The Milky Way, our galaxy, presents a captivating subject for photographers, its ethereal band of starlight a testament to the vastness of the cosmos. Capturing this celestial spectacle requires careful consideration of various technical aspects, particularly when photographing from specific geographical locations. The Southwestern United States offers a unique and advantageous setting for astrophotography. Its low population density in many areas contributes to remarkably dark skies, a crucial factor for revealing the faint light of distant stars and nebulae . Furthermore, the region's diverse and dramatic landscapes, characterized by deep canyons, towering mesas, and distinctive rock formations, provide compelling foreground elements that can add depth, scale, and narrative to astrophotography compositions . This report aims to elucidate the technical recommendations for successful Milky Way photography in the Southwest, explaining the scientific and practical underpinnings of each key setting and equipment choice.
2. Lens Selection: Capturing the Cosmic Expanse with Wide and Fast Primes
To effectively capture the Milky Way, a lens with specific characteristics is required. Given the galaxy's expansive nature across the night sky, a wide-angle lens is generally recommended, , , , , ]. Focal lengths typically ranging from 14mm to 35mm on a full-frame camera are often preferred as they provide a field of view broad enough to encompass a significant portion of the Milky Way's arc . This wider perspective also allows photographers to integrate terrestrial foreground elements, creating a more engaging and visually balanced composition . Furthermore, the use of a wide-angle lens has implications for shutter speed. Because the angular movement of stars due to Earth's rotation is spread across a wider area on the sensor with a wide lens, longer exposure times can be used before star trails become apparent, which is advantageous when a star tracker is not employed . However, it is worth noting that the choice of focal length within the wide-angle spectrum can influence the perceived size of the Milky Way's core; ultra-wide lenses, while capturing more of the sky, may render the core smaller compared to slightly longer wide-angle options . Therefore, the selection of the specific focal length should align with the photographer's artistic intent, considering the desired balance between the overall view of the Milky Way and the prominence of its central region.
In addition to the focal length, the maximum aperture of the lens is a critical consideration for Milky Way photography. The Milky Way emits a faint light, necessitating a "fast" lens with a wide maximum aperture (typically f/1.4 to f/2.8 or wider) to gather sufficient light . Prime lenses, which have a fixed focal length, are often designed to achieve wider maximum apertures (e.g., f/1.8, f/1.4) than many zoom lenses, which commonly have maximum apertures of f/2.8 or f/4 across their zoom range . This wider aperture in prime lenses allows for the capture of significantly more light, which can translate to shorter exposure times or the use of lower ISO settings to minimize image noise. Furthermore, prime lenses are frequently lauded for their superior optical performance compared to zoom lenses, often exhibiting greater sharpness, reduced distortion, and less chromatic aberration, particularly at their widest apertures . While zoom lenses offer the undeniable advantage of versatility in framing without the need to change lenses , the inherent limitations in maximum aperture and potential compromises in optical quality often make fast prime lenses a more optimal choice for the specific demands of capturing the subtle details and faint light of the Milky Way. The recommendations for lenses like the 20mm f/1.8 and 35mm f/1.8 prime lenses represent a well-regarded balance within the astrophotography community, offering both a sufficiently wide field of view and a fast enough aperture for effective Milky Way capture.
3. Aperture: Balancing Light and Sharpness in the Darkness
The aperture of a camera lens serves as the adjustable opening that controls the amount of light passing through to the image sensor. In the context of Milky Way photography, a wider aperture, denoted by a lower f-number such as f/1.8 or f/2.8, is highly advantageous as it allows for a greater volume of the faint light from the night sky to reach the sensor . This increased light-gathering capability is fundamental to capturing the subtle details and structures within the Milky Way. Moreover, a wider aperture facilitates the use of shorter shutter speeds to achieve a properly exposed image, which can be crucial in minimizing the effects of star trailing caused by the Earth's rotation .
However, the selection of aperture also involves a trade-off with image sharpness. While shooting a lens at its maximum aperture provides the most light, it can sometimes result in a decrease in overall image sharpness, particularly towards the edges of the frame. Additionally, wider apertures can accentuate optical aberrations inherent in lens design, such as coma and astigmatism, which can distort the appearance of stars . Most lenses exhibit a "sweet spot" for sharpness, typically found when the aperture is stopped down by one or two f-stops from its widest setting . For instance, a lens with a maximum aperture of f/1.8 might achieve its peak sharpness around f/2.0 or f/2.2. Despite this, in Milky Way photography, the priority often lies in maximizing light intake to capture the faint subject matter. Therefore, shooting at or near the lens's widest aperture (e.g., f/1.8 to f/2.8) is generally recommended to gather as much light as possible . The potential slight compromise in edge sharpness is often deemed acceptable in exchange for the enhanced brightness and detail obtained from the Milky Way itself. It is also important to note that while aperture plays a significant role in controlling depth of field in general photography, this is less of a concern when focusing on the Milky Way and stars. These celestial objects are located at an effectively infinite distance from the camera, rendering depth of field a less critical factor for the primary subject in astrophotography . The choice of aperture in this context is primarily driven by the need to manage light and mitigate optical imperfections.
4. Shutter Speed: Balancing Light and Motion in the Celestial Realm
Capturing the faint light of the Milky Way necessitates the use of longer shutter speeds, typically ranging from several seconds to tens of seconds, to allow the camera's sensor sufficient time to record the subtle illumination. The precise duration of the exposure is influenced by factors such as the lens's aperture, the ISO setting, and the overall darkness of the night sky. However, a significant challenge in long-exposure astrophotography is the phenomenon of star trails. These trails are caused by the Earth's continuous rotation, which results in the apparent movement of stars across the night sky. During a prolonged exposure, this movement is captured by the camera sensor, causing stars to appear as streaks or lines instead of sharp, pinpoint lights.
A commonly cited guideline to estimate the maximum shutter speed that can be used before star trails become noticeable is the "500 rule." This rule suggests dividing 500 by the focal length of the lens (in millimeters) to obtain the maximum exposure time in seconds . For instance, with a 20mm lens, the "500 rule" would recommend a maximum shutter speed of 25 seconds. However, the accuracy of this rule has become increasingly debated with the advent of modern digital cameras, particularly those equipped with high-resolution sensors. Originally developed for film cameras and early digital sensors with lower pixel densities, the "500 rule" often proves too lenient for contemporary sensors. The increased pixel density in modern cameras allows for the resolution of even minute movements of stars, resulting in visible trails at exposure times that the "500 rule" might suggest are acceptable.
Therefore, for achieving truly sharp, pinpoint stars with modern high-resolution cameras, it is often advisable to use shorter shutter speeds than those dictated by the "500 rule." Experimenting with slightly reduced exposure times (e.g., subtracting 5-10 seconds from the calculated value) can yield better results. Furthermore, a more accurate alternative for calculating the maximum shutter speed is the NPF rule. This formula takes into account not only the focal length but also the lens's aperture and the camera sensor's pixel pitch, providing a more tailored recommendation for minimizing star trails. However, using shorter shutter speeds inherently means capturing less light, which may necessitate the use of a wider lens aperture or a higher ISO setting to compensate and maintain proper exposure . For photographers aiming for extremely long exposures without star trails, a star tracker is an invaluable tool. This motorized mount precisely follows the apparent movement of the stars, allowing for exposures of several minutes or longer. However, it is important to note that when using a star tracker, any stationary foreground elements in the composition will likely appear blurred due to the camera's movement tracking the stars . In such scenarios, a common technique is to capture separate exposures for the sky and the foreground and then blend them together during post-processing.
5. ISO: Optimizing Sensitivity and Managing Noise in the Night
ISO is a fundamental camera setting that determines the sensitivity of the image sensor to light. In the realm of Milky Way photography, where light levels are exceptionally low, increasing the ISO is a crucial step to make the faint glow of the galaxy and distant stars visible in the captured image . A higher ISO value effectively amplifies the light signal received by the sensor, resulting in a brighter image even with short exposure times or narrow lens apertures.
However, this amplification process comes with an inherent trade-off: the introduction of digital noise. As the ISO is increased, not only is the desired light signal boosted, but also any random electronic noise present within the camera's sensor is amplified. This noise manifests as graininess or speckled patterns in the image, which can obscure subtle details, diminish image clarity, and negatively impact the overall visual quality .
For Milky Way photography, a common starting point for ISO settings is often between ISO 3200 and ISO 6400 for cameras equipped with full-frame sensors, and between ISO 1600 and ISO 3200 for those with crop-sensor (APS-C) sensors . These ranges typically offer a reasonable balance between achieving sufficient image brightness to reveal the Milky Way and keeping the level of digital noise within acceptable limits. It is crucial for photographers to experiment with different ISO values on their specific camera model to understand its noise performance at various sensitivities . Some cameras, particularly those with larger sensors and more advanced noise reduction technologies, tend to perform better at higher ISOs than others. Furthermore, a powerful technique to mitigate the noise introduced by higher ISO settings is image stacking. By taking multiple exposures of the same scene at the same settings and then combining them using specialized software in post-processing, the random noise can be effectively reduced, resulting in a cleaner final image with enhanced detail .
6. Focusing: Achieving Stellar Sharpness in the Infinite Distance
Achieving sharp focus on the stars, which are effectively at an infinite distance from the camera, presents a unique challenge in Milky Way photography, particularly in the absence of sufficient ambient light. In most cases, a camera's autofocus (AF) system, which relies on detecting contrast to find focus, will struggle to lock onto the faint and distant points of light in the night sky . Even cameras with sophisticated low-light autofocus capabilities may not perform reliably in the near-total darkness often encountered during Milky Way photography.
Therefore, precise manual focusing of the lens is essential to ensure that the stars are rendered as sharp, pinpoint lights in the final image . A highly effective technique for achieving accurate manual focus at night involves utilizing the camera's Live View function. The recommended procedure is as follows: First, switch the lens from autofocus to manual focus mode . Next, activate Live View, which displays a magnified real-time image from the sensor on the camera's LCD screen . Then, use the digital zoom feature within Live View to magnify a bright star visible in the frame, often to 5x or 10x magnification . Slowly and meticulously rotate the focus ring on the lens, observing the magnified star on the LCD. The objective is to adjust the focus until the star appears as the smallest and most sharply defined point of light . Stars that are out of focus will appear as blurry or diffuse circles. After achieving what seems to be the sharpest focus, it is recommended to take a test photograph and then zoom in on the image playback on the camera's LCD to confirm that the stars are indeed crisp and not exhibiting any blur . Minor focus adjustments can be made if necessary.
Another helpful tool for achieving precise focus on stars is a Bahtinov mask. This specialized filter is placed over the front of the lens and creates a distinct diffraction spike pattern around bright stars when they are out of focus. Perfect focus is indicated when the three central diffraction spikes form a symmetrical "X" shape bisected by a third spike . It is also important to be aware that the infinity mark (∞) on a lens should not be relied upon as the sole indicator of correct focus for astrophotography, as its position can vary slightly from true infinity, particularly with autofocus lenses . Finally, given that temperature fluctuations can cause subtle expansion or contraction of lens elements, it is advisable to periodically check and potentially fine-tune the focus during a prolonged night sky photography session to maintain optimal sharpness throughout the shooting period .
7. Considerations for the Southwest Landscape: A Unique Stage for the Cosmos
The Southwestern United States stands out as an exceptional location for Milky Way photography, primarily due to its vast, sparsely populated areas that boast remarkably dark skies, free from the pervasive light pollution that obscures the stars in more urbanized regions . Photographers seeking the darkest possible conditions are encouraged to consult light pollution maps, such as those available online, to pinpoint specific areas within the Southwest that offer the lowest levels of artificial light. Regions categorized as Bortle scale 1-3 are generally considered ideal for capturing the subtle details of the Milky Way .
Beyond the advantage of dark skies, the Southwest is renowned for its breathtaking and distinctive landscapes. The region's geological diversity provides a wealth of compelling foreground elements that can elevate a Milky Way photograph from a simple image of the night sky to a captivating visual narrative . Iconic formations like the sandstone buttes of Monument Valley, the intricate arches of Arches National Park, the unique hoodoos of Bryce Canyon, and the otherworldly badlands of Utah and Arizona offer stunning silhouettes and textures against the starry backdrop. The dramatic landscapes around Page, Arizona, including Horseshoe Bend and the shores of Lake Powell, also provide exceptional opportunities for incorporating foreground interest. Given the importance of a well-composed foreground, it is highly recommended to scout potential shooting locations during daylight hours. This allows photographers to identify interesting features and plan their compositions in advance, as navigating and composing effectively in complete darkness can be extremely challenging . In some instances, photographers may choose to illuminate the foreground using techniques such as light painting with a flashlight or by capturing separate exposures during twilight (blue hour) and blending them with the night sky exposure in post-processing.
8. Conclusion: Harmonizing Technical Choices for Stunning Nightscapes in the Southwest
Successful Milky Way photography in the Southwest is the result of a thoughtful synthesis of technical decisions, carefully aligned with the unique characteristics of the region and the inherent challenges of capturing faint celestial light. The recommendations outlined in this report – the selection of fast, wide-angle prime lenses, the strategic use of wide apertures, the careful determination of shutter speeds to balance light capture and minimize star trails, the optimization of ISO for sensitivity while managing noise, and the necessity of precise manual focusing – all contribute to maximizing the potential for capturing stunning images of our galaxy against the backdrop of the Southwest's dramatic landscapes and pristine night skies. By understanding the scientific and practical reasoning behind each technical choice and by experimenting with their interplay, photographers can effectively overcome the hurdles of night sky photography and harness the exceptional opportunities the Southwest offers to create truly captivating astrophotographic art.
Shutter Speed Recommendations Based on Focal Length (Full-Frame Camera)
8 seconds or shorter, depending on focal length. The longer the lens, the faster the shutter speed required.
Recommended Starting Camera Settings for Milky Way Photography in the Southwest
Wide Prime (e.g., 20mm f/1.8)
Offers wide field of view and fast aperture for optimal light gathering and image quality.
Aperture
f/1.8 - f/2.8
Maximizes light intake from the faint Milky Way while maintaining reasonable sharpness.
Shutter Speed
NPF Rule based or shorter than 500 Rule
Balances light capture with the need to minimize star trails, especially with modern high-resolution sensors.
ISO
3200 - 6400 (Full-Frame)
Optimizes sensor sensitivity to capture faint light while keeping noise at a manageable level; adjust based on camera performance.
1600 - 3200 (Crop-Sensor)
Focus
Manual via Live View
Ensures precise focus on distant stars, as autofocus typically struggles in low light.
White Balance
3400 - 4400K
A starting point for achieving natural-looking colors in the night sky; can be fine-tuned in post-processing.