A Guide to Wildlife Photography for the Wildlife Photographer.

Photos copyright © Jess Lee
A Guide to Starting Your Journey as a Wildlife Photographer
Wildlife photography is a captivating and rewarding pursuit that allows you to connect with nature on a profound level while creating stunning visual narratives of the animal kingdom. This comprehensive guide will take you through each crucial step of becoming a wildlife photographer, providing in-depth information, practical tips, and insights to help you embark on this exciting journey.
1. Develop Your Passion and Knowledge
The foundation of any successful wildlife photographer is a deep-seated passion for both wildlife and photography. This passion fuels the patience and perseverance required to capture those perfect moments in nature. Here's how you can nurture and develop this crucial aspect:
Study Wildlife Behavior
Immerse yourself in the world of wildlife through various mediums. Read extensively about different species, their habitats, behaviors, and conservation status. Books by renowned naturalists and wildlife photographers like Jane Goodall, Frans Lanting, or David Attenborough can provide invaluable insights. Documentaries, such as BBC's Planet Earth series or National Geographic productions, offer visual learning opportunities, showcasing animal behaviors and habitats in stunning detail.
Follow reputable wildlife photographers on social media platforms like Instagram, Facebook, or specialized photography sites. Photographers like Paul Nicklen, Melissa Groo, or Will Burrard-Lucas often share behind-the-scenes information and tips along with their images. Pay attention to how they describe their encounters, the challenges they faced, and the techniques they used.
Join online forums or local wildlife groups to engage in discussions about animal behavior. These communities can be excellent sources of local knowledge and may even lead to photography opportunities or mentorship.
Understanding your subjects in depth will significantly improve your ability to anticipate their actions. For instance, knowing that a cheetah is likely to scan its surroundings from an elevated position before a hunt can help you prepare for that perfect portrait shot. Similarly, understanding the courtship rituals of birds can help you capture dynamic interaction shots.
Practice Observational Skills
Developing keen observational skills is crucial for wildlife photography. Start by spending time in nature, even if it's just in your local park or backyard. Practice identifying different species of birds, insects, or small mammals. Pay attention to their behaviors, calls, and interactions with the environment.
Keep a nature journal where you note your observations. Include details like the time of day, weather conditions, and any interesting behaviors you witness. This practice will sharpen your attention to detail and help you start thinking like a wildlife photographer.
Use field guides specific to your region to help with identification. Apps like Merlin Bird ID or iNaturalist can be helpful tools for beginners. As you become more proficient, challenge yourself to identify animals by their calls or subtle behavioral cues.
Observing animals in their natural habitat will also help you understand the challenges of wildlife photography. You'll learn about the importance of patience, the unpredictability of animal behavior, and the impact of environmental factors on your subjects and your photography.
Learn Photography Basics
A solid understanding of photography fundamentals is essential before delving into the specifics of wildlife photography. Start by mastering the exposure triangle - the relationship between aperture, shutter speed, and ISO. Each of these elements affects not only the exposure of your image but also its creative aspects:
- Aperture controls depth of field, allowing you to isolate your subject from the background or keep an entire scene in focus.
- Shutter speed determines whether you freeze action or introduce creative motion blur.
- ISO affects the sensitivity of your camera's sensor, enabling you to shoot in various lighting conditions at the cost of potential image noise.
Understanding how these elements interact will give you the flexibility to adapt to the ever-changing conditions of wildlife photography.
Composition is another crucial aspect of photography. While rules like the rule of thirds provide a good starting point, wildlife photography often requires quick thinking and adapting to your subject's movements. Study concepts like leading lines, negative space, and framing. Look at award-winning wildlife photographs and analyze their composition. What makes them compelling? How do they guide the viewer's eye?
Practice these skills with whatever camera you have available, even if it's just a smartphone. The technical limitations of simpler cameras can actually help you focus on composition and timing, two critical skills in wildlife photography. Experiment with different angles, lighting conditions, and subjects. Try photographing fast-moving subjects like birds or insects in your garden to practice tracking and focusing techniques.
Remember, the goal at this stage is not to produce National Geographic-worthy images, but to develop your eye for composition and your understanding of how your camera translates a three-dimensional scene into a two-dimensional image. But alway strive to make Nat Geo quality work.
2. Invest in Essential Equipment
While it's true that great photos can be taken with basic gear, wildlife photography often demands specialized equipment to capture subjects that are shy, fast-moving, or far away. However, it's important to balance your enthusiasm with practicality, especially when you're just starting out. Here's a detailed look at the essential equipment for wildlife photography:
Camera Body
When choosing a camera for wildlife photography, several factors come into play:
1. Autofocus System: Wildlife subjects often move quickly and erratically. A camera with a sophisticated autofocus system, particularly one with good tracking capabilities, is invaluable. Look for cameras with a high number of focus points spread across the frame.
2. Burst Rate: Animals can change positions in the blink of an eye. A camera with a fast continuous shooting speed (measured in frames per second) allows you to capture fleeting moments and behaviors.
3. ISO Performance: Wildlife is often most active during dawn and dusk when light is limited. A camera that performs well at high ISOs will allow you to keep shooting in these challenging conditions.
4. Weather Sealing: Nature can be unpredictable, and you'll likely find yourself shooting in less-than-ideal weather conditions. Weather-sealed bodies offer protection against moisture and dust.
5. Resolution: While not the most critical factor, higher resolution can be beneficial if you plan to make large prints or want the flexibility to crop your images significantly.
For beginners, an entry-level DSLR or mirrorless camera can be a great starting point. As you advance, you might consider upgrading to a more specialized wildlife photography camera. Brands like Canon, Nikon, Sony, and Olympus all offer models well-suited for wildlife photography at various price points.
Lenses
The lens is arguably the most important piece of equipment for a wildlife photographer. Wildlife subjects are often shy or dangerous, requiring you to maintain a safe distance. This is where telephoto lenses come in:
1. Zoom Lenses: For beginners, a versatile zoom lens like a 70-300mm is a good starting point. It offers flexibility in framing and is generally more affordable than longer telephoto lenses. As you progress, consider upgrading to a 100-400mm or 150-600mm lens. These offer greater reach while still providing the versatility of a zoom.
2. Prime Lenses: Prime lenses with long focal lengths (300mm, 400mm, 500mm, 600mm) are favored by many professional wildlife photographers for their superior image quality and wider maximum apertures. However, they are also more expensive and less versatile than zoom lenses. A 300mm f/4 or 400mm f/5.6 can be a good entry point into prime telephoto lenses.
3. Teleconverters: These devices multiply the focal length of your lens (typically by 1.4x or 2x) at the cost of some light (1 or 2 stops respectively). They can be a cost-effective way to increase your reach, although they do impact image quality to some degree.
When choosing lenses, consider factors like image stabilization (crucial for handheld shooting with long lenses), maximum aperture (wider apertures let in more light but are more expensive), and compatibility with teleconverters.
Support Systems
Long lenses are heavy and can be difficult to hold steady, especially for extended periods. Good support systems are crucial:
1. Tripods: A sturdy tripod is essential for wildlife photography. Look for one that's both stable and lightweight, as you may need to carry it for long distances. Carbon fiber tripods offer an excellent balance of strength and weight but are more expensive than aluminum alternatives.
2. Monopods: These offer a good compromise between stability and mobility. They're particularly useful when you need to move quickly to track subjects or when tripods aren't practical or allowed.
3. Gimbal Heads: For very long and heavy lenses, a gimbal head allows smooth panning and tilting while supporting the weight of your setup. They're especially useful for photographing birds in flight or other fast-moving subjects.
4. Bean Bags: These can be useful for shooting from a vehicle or low to the ground. They conform to various surfaces and provide stable support.
Accessories
Several accessories can make your wildlife photography more effective and enjoyable:
1. Memory Cards: Fast, high-capacity memory cards are essential. Wildlife photography often involves burst shooting, which generates a lot of data quickly.
2. Extra Batteries: Long days in the field mean you'll need spare batteries. Always carry more than you think you'll need.
3. Rain Cover: Weather can change quickly, and a good rain cover can protect your gear in unexpected showers.
4. Cleaning Kit: Dust and moisture are constant challenges in outdoor photography. A basic cleaning kit helps maintain your equipment in the field.
5. Comfortable Camera Bag: You'll likely be carrying your gear for extended periods. Invest in a bag that distributes weight evenly and provides quick access to your equipment.
6. Binoculars: These are invaluable for spotting and observing wildlife before setting up your shot.
Remember, while good equipment can make certain shots easier to achieve, it's your skills and creativity that truly make a great wildlife photograph. Start with what you can afford, learn to use it well, and upgrade as your skills and needs evolve.
3. Master Your Camera Settings
Knowing your camera inside and out is crucial for wildlife photography. Animals won't wait for you to fumble with settings, so being able to adjust quickly and instinctively is key. Here's a deep dive into the most important camera settings for wildlife photography:
Shooting Modes
1. Aperture Priority (A or Av): This is often the go-to mode for many wildlife photographers. It allows you to control the depth of field by setting the aperture, while the camera adjusts the shutter speed to maintain proper exposure. This is particularly useful when you're dealing with changing light conditions but want to maintain a consistent depth of field.
For example, when photographing a stationary animal, you might choose a wider aperture (lower f-number) to blur the background and make your subject stand out. Conversely, for a group of animals, you might opt for a smaller aperture to ensure all individuals are in focus.
2. Shutter Priority (S or Tv): This mode is useful when the speed of your subject is the most critical factor. You set the shutter speed, and the camera adjusts the aperture. It's particularly helpful for freezing fast action or intentionally introducing motion blur.
For instance, you might use a fast shutter speed (1/2000s or faster) to freeze a bird in flight, or a slower speed (1/15s or slower) to blur the wings of a hummingbird while keeping its body sharp.
3. Manual Mode (M): As you gain experience, you'll likely find yourself using manual mode more often. It gives you complete control over all exposure parameters. This is particularly useful in tricky lighting situations or when you're using flash.
Manual mode is also essential when using flash, as it allows you to balance ambient light with your flash output for more natural-looking images.
Autofocus Settings
Mastering your camera's autofocus system is crucial for capturing sharp images of moving wildlife:
1. AF Modes:
- Single-Shot AF (AF-S or One-Shot AF): Use this for stationary subjects. The camera focuses once when you half-press the shutter button.
- Continuous AF (AF-C or AI Servo): This mode continuously adjusts focus as long as you hold the shutter button halfway. It's ideal for moving subjects.
- Automatic AF (AF-A or AI Focus): This mode automatically switches between single and continuous AF depending on subject movement. While convenient, many photographers prefer to manually choose between AF-S and AF-C for more predictable results.
2. AF Area Modes:
- Single-Point AF: Allows you to select one specific focus point. This is useful for precise focusing, especially with stationary subjects or when shooting through obstacles like grass or branches.
- Dynamic-Area AF or Expansion AF: The camera uses the selected focus point and a surrounding area. If your subject briefly moves from the selected point, the camera will use the surrounding points to maintain focus.
- Group AF: Similar to dynamic-area, but uses a larger group of focus points. This can be useful for larger or erratically moving subjects.
- 3D Tracking (Nikon) or iTR (Canon): These modes use color and distance information to track subjects across the entire frame. They can be very effective for subjects that move unpredictably.
- Auto-Area AF: The camera automatically selects the focus point(s) based on what it perceives as the subject. While this can work well in some situations, it gives you the least control and may not always focus on your intended subject.
Experiment with these modes to see which work best for different scenarios. For example, single-point AF might be perfect for a perched bird, while 3D tracking could be ideal for a running animal.
Drive Modes
1. Single Shot: One photo is taken each time you press the shutter button. This is useful for deliberate, carefully composed shots of stationary subjects.
2. Continuous Low: The camera takes photos continuously at a slower rate while the shutter button is held down. This can be useful when you want to capture a sequence of images but don't need the highest possible frame rate.
3. Continuous High: The camera shoots at its maximum frame rate while the shutter is held down. This is ideal for fast action sequences, like a cheetah running or a bird taking flight.
Some cameras also offer an electronic shutter mode, which can allow for completely silent shooting (great for easily startled wildlife) and even faster burst rates.
Custom Settings
Modern cameras offer extensive customization options. Here are some useful custom settings for wildlife photography:
1. Back-Button Focus: This separates autofocus from the shutter button, assigning it to a button on the back of the camera. This allows you to maintain focus on a subject without having to keep the shutter half-pressed, and lets you quickly switch between continuous and single-shot focus.
2. Custom Shooting Modes: Many cameras allow you to save groups of settings to custom modes on the mode dial. You might set up one mode for birds in flight (fast shutter speed, continuous AF, high burst rate) and another for low-light wildlife portraits (higher ISO, wider aperture).
3. Custom Buttons: Assign frequently used functions to custom buttons. For example, you might set one button to quickly change your AF mode, and another to adjust ISO.
4. Auto ISO: Set up Auto ISO with a minimum shutter speed to ensure you're always shooting at a speed fast enough to avoid camera shake, even in changing light.
Remember, the "best" settings can vary depending on your specific situation, subject, and personal preferences. The key is to practice with these settings in various scenarios so you can adjust quickly and instinctively in the field.
4. Develop Field Craft
Field craft is the art of finding and approaching wildlife without disturbing them. It's a crucial skill for wildlife photographers, often making the difference between capturing extraordinary moments and going home empty-handed. Here's an in-depth look at how to develop your field craft:
Research Locations
Thorough research is the foundation of successful wildlife photography:
1. Study Maps and Field Guides: Familiarize yourself with the geography and ecosystems of your chosen location. Topographic maps can help you understand the terrain, while field guides provide information about local species and their habitats.
2. Identify Wildlife Hotspots: Research areas known for wildlife activity. These might include watering holes, migratory routes, or feeding grounds. Online resources, local nature groups, and park rangers can be valuable sources of information.
3. Understand Seasonal Patterns: Many animals have predictable seasonal behaviors. For example, knowing the breeding season of a particular bird species can help you locate and photograph courtship displays.
4. Learn About Local Conservation Efforts: Understanding ongoing conservation projects can provide insights into wildlife populations and potential photography opportunities.
5. Weather Patterns: Study local weather patterns and how they affect wildlife behavior. For instance, many animals are more active during cooler parts of the day in hot climates.
6. Sunrise and Sunset Times: Know when the "golden hours" occur. These periods often provide the best light for photography and coincide with increased animal activity.
Practice Stealth
The ability to move quietly and remain undetected is crucial for getting close to wildlife:
1. Dress Appropriately: Wear muted colors that blend with the environment. Avoid bright colors or patterns that might startle animals. In some environments, camouflage clothing can be helpful.
2. Move Slowly and Deliberately: Quick movements can startle wildlife. Practice moving slowly and steadily. When changing position, make your movements gradual and smooth.
3. Use Natural Cover: Learn to use the landscape to your advantage. Trees, rocks, and even tall grass can help conceal your presence. Always try to keep something between you and your subject as you approach.
4. Be Aware of Wind Direction: Animals have a keen sense of smell. Always try to approach from downwind to avoid detection.
5. Minimize Noise: Be conscious of the sounds you make. Avoid rustling clothing, talking, or stepping on noisy surfaces like dry leaves.
6. Use Blinds or Hides: Sometimes, the best approach is to let the wildlife come to you. Portable blinds or permanent hides can be excellent tools for observing and photographing without disturbing animals.
Respect Wildlife
Ethical considerations should always be at the forefront of wildlife photography:
1. Maintain a Safe Distance: Use long lenses to photograph animals from a distance that doesn't affect their behavior. If an animal shows signs of stress, back off immediately.
2. Learn to Read Animal Behavior: Understanding stress signals in different species can help you avoid causing distress. Signs might include alert postures, alarm calls, or movements away from you.
3. Never Bait or Manipulate Wildlife: Luring animals with food or artificially staging situations is unethical and can be harmful to the animals.
4. Follow Local Guidelines: Adhere to park rules and wildlife viewing guidelines. These are designed to protect both you and the animals.
5. Minimize Habitat Disturbance: Stick to designated paths and avoid trampling vegetation. Your presence should leave no trace.
Be Patient
Patience is perhaps the most important trait for a wildlife photographer:
1. Wait for the Right Moment: Often, the best shots come after hours of waiting. Learn to enjoy the process of observing and waiting.
2. Return to Locations: Revisiting the same spots at different times can yield diverse results as animals' behaviors change throughout the day and seasons.
3. Anticipate Behavior: As you observe, try to predict what an animal might do next. This can help you be ready for that perfect shot.
4. Embrace "Failure": Not every outing will result in great photos. View these as learning experiences and opportunities to refine your approach.
Perfect Your Technique
Refining your photographic technique is an ongoing process that requires practice, experimentation, and a keen eye for detail. As you spend more time in the field, you'll develop a deeper understanding of how to create compelling wildlife images. Here's an in-depth look at key areas to focus on:
Composition
Composition is the foundation of any great photograph, and in wildlife photography, it can be particularly challenging due to the unpredictable nature of your subjects. Here are some techniques to consider:
1. Rule of Thirds: This classic composition guideline suggests dividing your frame into a 3x3 grid and placing key elements along these lines or at their intersections. In wildlife photography, this might mean positioning an animal's eye at one of the intersections or aligning a horizon with the upper or lower third of the frame. While not a hard and fast rule, this technique often creates balanced, visually pleasing images.
2. Negative Space: Don't be afraid to leave empty space in your frame. This technique can be particularly effective in wildlife photography, creating a sense of environment and emphasizing your subject. For example, a lone bird perched on a branch with a large expanse of sky can create a powerful, minimalist image that speaks to the animal's habitat and perhaps even its solitude.
3. Leading Lines: Natural elements in your scene can be used to guide the viewer's eye through the image. This might be a fallen log leading to a resting deer, a shoreline curving towards a group of penguins, or even the direction an animal is looking. These lines don't have to be literal – the gaze of your subject can act as an implied line, encouraging the viewer to look where the animal is looking.
4. Eye Level: Whenever possible, try to photograph at your subject's eye level. This perspective creates a more intimate, engaging image that allows the viewer to connect with the animal. It might mean lying on your stomach to photograph a small ground-dwelling creature or using a low-set hide for larger animals. This technique often requires extra effort but can result in much more impactful images.
5. Background: In the excitement of photographing wildlife, it's easy to focus solely on the subject and forget about the background. However, a clean, non-distracting background can make your subject stand out and create a more professional-looking image. Be aware of what's behind your subject and adjust your position if necessary to avoid distracting elements. Sometimes, moving just a few inches can make a significant difference in the background.
Lighting
Understanding and working with light is crucial in all forms of photography, and wildlife photography is no exception. Different lighting conditions can dramatically alter the mood and impact of your images:
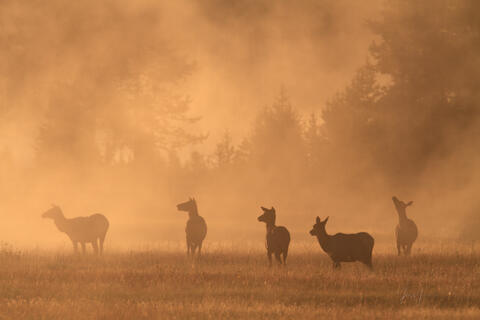
1. Golden Hour: The soft, warm light just after sunrise and before sunset is often considered ideal for wildlife photography. During these times, the low angle of the sun creates long shadows and a warm color cast that can add depth and atmosphere to your images. Many animals are also more active during these cooler parts of the day, making it an excellent time for wildlife observation and photography. However, the golden hour is brief, so be prepared and know your subject's habits to make the most of this magical light.
2. Backlighting: Placing the sun behind your subject can create dramatic effects. It can produce striking silhouettes, where the animal's shape is rendered in dark contrast against a bright background. Alternatively, if exposed correctly, backlighting can create a beautiful rim light effect, where the edges of your subject are outlined in a golden glow. This technique can be challenging to master but can result in uniquely beautiful images.
3. Overcast Days: While many photographers prefer the dramatic light of sunny days, overcast conditions can be excellent for wildlife photography. Clouds act as a giant softbox, creating even, diffused light that can be perfect for bringing out details and colors in your subject. This light is particularly useful for photographing animals with high contrast coloration, as it reduces harsh shadows that might obscure details.
4. Flash: The use of flash in wildlife photography is a topic of debate among photographers, and it should always be used with caution to avoid disturbing animals. However, when used appropriately, flash can be a valuable tool. It can be used to fill in shadows in harsh midday light, add catchlights to an animal's eyes, or provide illumination in low light conditions. If you do use flash, consider using diffusers or off-camera flash techniques to create more natural-looking light. Always be aware of your subject's reaction and stop using flash if the animal shows signs of distress.
Capturing Behavior
While portraits of animals can be beautiful, images that capture interesting behaviors or interactions often have the most impact. Here's how to approach behavior-based wildlife photography:
1. Learn Animal Behaviors: The more you understand about your subjects, the better equipped you'll be to anticipate and capture interesting moments. Study the habits, social structures, and daily routines of the species you want to photograph. For example, knowing the courtship rituals of a particular bird species can help you be in the right place at the right time to capture dramatic displays.
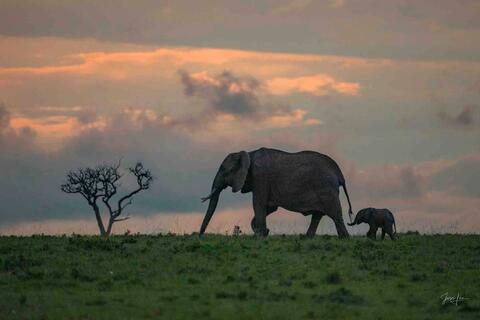
2. Tell a Story: Look for images that convey something about the animal's life or environment. This might be a mother nurturing her young, an animal demonstrating problem-solving skills to access food, or a predator stalking its prey. These narrative images often resonate more strongly with viewers than simple portraits.
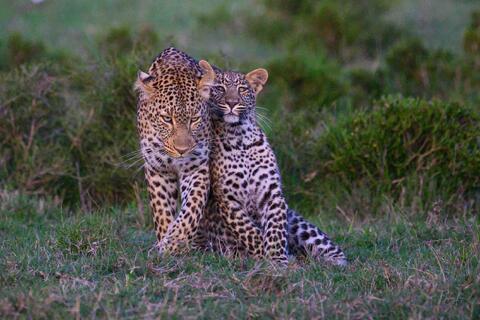
3. Capture Interaction: Photos of animals interacting with each other or their environment often have more impact than isolated portraits. This could be social grooming among primates, birds engaging in aerial disputes, or animals foraging in their habitat. These interactions provide context and bring your subject to life.
4. Be Patient and Observant: Interesting behaviors often happen in fleeting moments. Spend time observing your subjects without your camera to your eye. This allows you to anticipate behaviors and be ready when something interesting occurs.
5. Ethical Considerations: Always prioritize the well-being of your subjects over getting a shot. Avoid any practices that might alter natural behaviors or put stress on the animals.
Post-Processing
Post-processing is an integral part of digital photography, allowing you to refine and enhance your images. However, it's important to approach this step thoughtfully, especially in wildlife photography where authenticity is highly valued:
1. Develop a Consistent Style: While each image may require different adjustments, having a consistent approach to color, contrast, and overall mood can help create a cohesive portfolio. This doesn't mean all your images should look the same, but rather that they should feel like they belong together. Experiment with different processing styles to find one that resonates with your vision as a photographer.
2. Be Ethical in Editing: It's important to enhance your images in a way that stays true to the reality of the scene. Minor adjustments to exposure, contrast, and color are generally accepted, but significant alterations (like adding or removing elements from the scene) are often frowned upon in wildlife photography. Be transparent about your editing process if asked.
3. Learn Advanced Techniques: As you progress, learn more sophisticated editing techniques. Skills like selective adjustments allow you to enhance specific parts of your image without affecting others. Noise reduction is crucial for images taken in low light conditions with high ISO settings. Proper sharpening can bring out the fine details in your subject's fur or feathers without creating unnatural-looking results.
4. Calibrate Your Monitor: Ensure your computer monitor is properly calibrated. This ensures that the colors and tones you see while editing are accurate, leading to better final results when your images are viewed on other devices or printed.
5. Consider the End Use: How you process an image might vary depending on its intended use. An image for web display might be processed differently than one intended for large-format printing. Always keep your end goal in mind during post-processing.
Remember, post-processing should enhance your in-camera work, not replace good field technique. The goal is to present your subject in the best possible light while maintaining the integrity of the moment you captured.
6. Build Your Portfolio
A strong portfolio is crucial for showcasing your work and potentially turning your passion into a career. It's often the first impression you'll make on potential clients, editors, or gallery owners. Here's how to create a portfolio that stands out:
1. Be Selective: Quality always trumps quantity when it comes to portfolios. Include only your absolute best work. This might mean being ruthless in your selection process, but remember that a portfolio is only as strong as its weakest image. It's better to have a small collection of exceptional photos than a large group of mediocre ones.
2. Show Diversity: While it's good to demonstrate expertise in a particular area, also aim to showcase your versatility as a photographer. Include a range of species, from large mammals to small insects, and various types of shots such as wide-angle environmental portraits, intimate close-ups, and action shots. Also, consider including images from different habitats and seasons to demonstrate your ability to work in various conditions.
3. Tell Stories: Consider grouping images into series that tell a story about a particular species or ecosystem. This approach can demonstrate your deep understanding of your subjects and your ability to document wildlife comprehensively. For example, you might have a series showing different stages of a bird's nesting cycle, or images depicting the changing seasons in a particular habitat.
4. Keep it Current: Regularly update your portfolio with your latest and best work. This shows that you're actively shooting and continuously improving. However, don't completely abandon older images if they're still among your best – a great photo is timeless.
5. Seek Feedback: Share your portfolio with other photographers, editors, or professionals in the field for constructive criticism. Fresh eyes can often spot strengths or weaknesses that you might have overlooked. Be open to this feedback and use it to refine your selection.
6. Consider Different Formats: In today's digital age, an online portfolio is essential. Platforms like Squarespace, Wix, or WordPress offer user-friendly ways to create a professional-looking website. However, don't neglect physical portfolios. A carefully curated book of prints can be a powerful tool in face-to-face meetings.
7. Tailor for Your Audience: If you're using your portfolio to seek specific opportunities (like magazine work or gallery exhibitions), consider creating versions tailored to these purposes. For instance, a portfolio for editorial work might focus more on storytelling series, while one for fine art sales might emphasize your most visually striking single images.
Remember, your portfolio is a reflection of you as a photographer. It should not only demonstrate your technical skills but also convey your unique vision and passion for wildlife.
7. Continual Learning and Improvement
The field of wildlife photography is always evolving, with new techniques, technologies, and artistic trends emerging regularly. Staying current and continuously improving your skills is crucial for long-term success. Here are some strategies for ongoing learning and development:
1. Attend Workshops and Conferences: Participating in photography workshops, especially those led by renowned wildlife photographers, can provide invaluable insights and hands-on learning experiences. These events often combine classroom learning with field sessions, allowing you to apply new techniques immediately. Photography conferences are excellent opportunities to learn about industry trends, network with fellow photographers, and get inspired by presentations from leading professionals.
2. Join Photography Communities: Becoming part of a community of photographers can provide ongoing support, inspiration, and learning opportunities. Look for local photography clubs or online forums dedicated to wildlife photography. These communities often organize outings, challenges, and critiquing sessions that can help you grow as a photographer.
3. Experiment with New Techniques: Don't be afraid to step out of your comfort zone and try new approaches to wildlife photography. This might include techniques like camera trapping for shy species, using remote triggers for close-up shots of dangerous animals, or even venturing into underwater wildlife photography. Each new technique you master adds another tool to your photographic toolkit.
4. Stay Updated on Technology: Keep abreast of developments in camera technology, lenses, and accessories. While you don't need to buy every new piece of gear that comes out, understanding the capabilities of new equipment can help you make informed decisions about potential upgrades. Also, stay current with advances in post-processing software, as new tools can often help you enhance your images in ways that weren't previously possible.
5. Study Other Photographers' Work: Regularly expose yourself to high-quality wildlife photography. Follow the work of photographers you admire on social media, study award-winning images from competitions like Wildlife Photographer of the Year, and read wildlife and nature photography magazines. Analyze these images to understand what makes them effective – consider aspects like composition, lighting, timing, and storytelling.
6. Diversify Your Skills: Consider learning complementary skills that can enhance your wildlife photography. This might include studying animal behavior, learning about conservation issues, or developing your writing skills to better tell the stories behind your images.
7. Seek Mentorship: If possible, find a more experienced wildlife photographer who can serve as a mentor. A mentor can provide personalized advice, help you avoid common pitfalls, and potentially even introduce you to valuable professional connections.
8. Teach Others: As you gain experience, consider sharing your knowledge through workshops, blog posts, or mentoring less experienced photographers. Teaching is an excellent way to solidify your own understanding and often leads to new insights.
9. Travel and Explore: Whenever possible, expose yourself to new environments and species. Each new location presents unique challenges and learning opportunities. Even if extensive travel isn't feasible, exploring new local areas can provide fresh perspectives.
Remember, the journey of a wildlife photographer is one of lifelong learning. Embrace each experience, whether it results in award-winning images or not, as an opportunity to grow and improve your craft.
8. Consider Conservation and Ethics
As a wildlife photographer, you have a unique opportunity – and responsibility – to be a voice for nature. Your images can inspire conservation efforts, educate the public about wildlife, and promote ethical interactions with nature. Here's how you can incorporate conservation and ethics into your wildlife photography practice:
1. Tell Conservation Stories: Use your images to raise awareness about environmental issues and endangered species. This might involve documenting the impacts of habitat loss, climate change, or human-wildlife conflict. Consider partnering with conservation organizations to tell these stories more effectively. Your images, combined with scientific data and conservation messages, can be a powerful tool for change.
2. Practice and Promote Ethical Photography: Always prioritize the well-being of your subjects over getting a shot. This means maintaining a respectful distance, never baiting animals or disturbing their natural behaviors, and being mindful of sensitive habitats. Share your ethical practices with your audience to educate others about responsible wildlife photography.
3. Support Conservation Efforts: Consider donating a portion of your proceeds from print sales or assignments to wildlife conservation organizations. You could also offer your photographic services to local conservation projects, helping them document their work and raise awareness.
4. Educate Your Audience: Use your platform – whether it's social media, a blog, or presentations – to educate others about the species you photograph and the ecosystems they inhabit. Share interesting facts about animal behavior, their role in the ecosystem, and the challenges they face. This education can foster a deeper appreciation for wildlife and motivate conservation action.
5. Be Truthful in Your Representation: Always be honest about the circumstances under which your images were taken. If an animal was photographed in a captive setting, disclose this information. Misrepresentation can lead to unrealistic expectations and potentially harmful behaviors from others trying to replicate your shots.
6. Understand Local Regulations and Cultures: When photographing wildlife, especially in foreign locations, be aware of and respect local laws and cultural attitudes towards wildlife. What might be an accepted practice in one area could be offensive or illegal in another.
7. Minimize Your Environmental Impact: Be conscious of your impact on the environment while pursuing wildlife photography. This includes being careful not to damage vegetation when setting up your gear, properly disposing of waste, and considering the carbon footprint of your travel.
8. Use Your Images for Research: Consider contributing your images to scientific databases or collaborating with researchers. Wildlife photographs can provide valuable data for scientists studying animal populations, behaviors, and habitats.
9. Stay Informed About Conservation Issues: Keep yourself educated about current conservation issues, especially those affecting the species and habitats you photograph. This knowledge will inform your work and allow you to be a more effective advocate for wildlife.
By incorporating these ethical and conservation-minded practices into your work, you can ensure that your wildlife photography not only captures beautiful images but also contributes positively to the natural world you're documenting. Remember, as a wildlife photographer, you're not just an observer of nature, but a steward as well.
In conclusion, becoming a skilled wildlife photographer is a journey that requires time, patience, and dedication. It involves developing a deep respect for nature, honing your technical skills, and cultivating your unique creative vision. Embrace the learning process, respect the natural world, and above all, enjoy the incredible experiences that wildlife photography offers. With persistence and passion, you can create images that not only showcase the beauty of the natural world but also inspire others to protect it. Every time you pick up your camera, remember the privilege and responsibility you have as a wildlife photographer – to capture fleeting moments of natural beauty and to be a voice for the voiceless inhabitants of our planet.